Hey there fitness junkies! Have you ever hopped onto a treadmill, all ready for your intense workout, only to be baffled by confusing error messages flashing on the display? Don’t sweat it! We’ve all been there. It’s time to demystify those pesky treadmill errors and equip you with the knowledge to troubleshoot and fix them like a pro. In this article, we’ll dive into the most common errors you might encounter on treadmill displays and provide you with easy, step-by-step solutions to get you back on track towards your fitness goals. So, let’s lace up our shoes and embark on this troubleshooting journey together!
Table of Contents
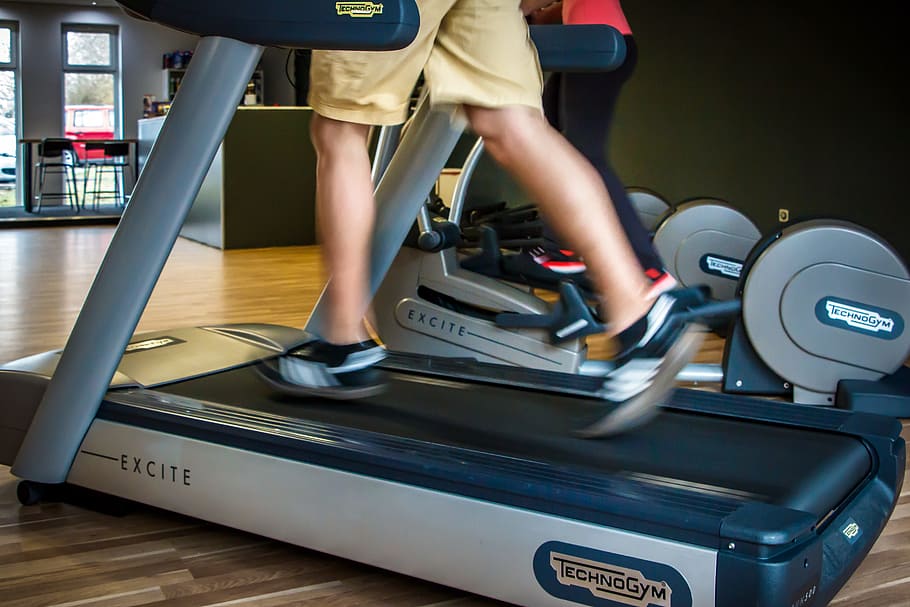
- Treadmill Display Errors: Troubleshooting Tips to Get Back on Track
- Decoding Error Messages: Understanding What Your Treadmill is Trying to Tell You
- Calibration Woes: Fine-tuning your Treadmill’s Display for Accurate Readings
- Inaccurate Speed Readings: How to Adjust Speed Sensors and Restore Precision
- Heart Rate Monitor Glitches: Troubleshooting Tips for Accurate Heart Rate Tracking
- Entertainment Console Malfunctions: Restoring Functionality for an Enjoyable Workout Experience
- Q&A
- Final Thoughts
Treadmill Display Errors: Troubleshooting Tips to Get Back on Track
Encountering display errors on your treadmill can be frustrating and disrupt your workout routine. But fear not! We’ve compiled a list of troubleshooting tips to help you get back on track in no time.
1. Check the power source: Ensure that your treadmill is properly plugged in and that the power source is functioning. Sometimes, a loose connection or power outage can cause the display to malfunction.
2. Restart the treadmill: Similar to your computer, a simple restart can often resolve display issues. Turn off the treadmill, unplug it from the power source, wait for a few minutes, and then plug it back in. This action can give your treadmill a fresh start and clear any temporary glitches.
3. Inspect the console connections: Occasionally, the display errors can be caused by loose or damaged wires. Carefully examine the console connections, ensuring that all cables and connectors are securely plugged in. If any cables appear frayed or damaged, it’s advisable to replace them.
4. Update the firmware: Much like your smartphone or computer, treadmill consoles often receive software updates to improve performance and fix bugs. Check the manufacturer’s website for any available firmware updates and follow the instructions provided to update your treadmill’s software.
5. Consult the user manual: When all else fails, your treadmill’s user manual can be a valuable resource for troubleshooting specific display errors. Look up the error code or description in the manual’s troubleshooting section, where you may find step-by-step instructions to address the issue.
By following these troubleshooting tips, you can resolve most display errors on your treadmill and get back to enjoying your workouts without any interruptions. If the issue persists or you encounter more complex errors, it’s recommended to reach out to the treadmill manufacturer’s customer support for further assistance. Happy troubleshooting and happy running!
Decoding Error Messages: Understanding What Your Treadmill is Trying to Tell You
So, you’re all ready to hit the ground running on your trusty treadmill, but suddenly, an error message pops up on the display. Frustrating, isn’t it? Don’t worry, we’re here to help you decode those cryptic messages and get your treadmill back on track.
Here are some common error messages you may encounter while using your treadmill:
- E1: Speed Sensor Error – This error usually means that there is an issue with the speed sensor of your treadmill. To fix it, try cleaning the speed sensor or adjusting its alignment. If the problem persists, you might need to replace the sensor.
- E2: Incline Error – The E2 error message appears when there is a problem with the incline function. This could be due to a misalignment or a faulty incline motor. Check the alignment of your treadmill and make sure there are no obstacles obstructing the movement. If the issue persists, contact customer support for further assistance.
- E3: Belt Error – If you see the E3 error message, it means that there is an issue with the treadmill’s belt. Check if the belt is properly lubricated and properly aligned. Inspect for any signs of wear or damage and replace it if necessary.
Remember, these error messages are just your treadmill’s way of communicating with you. They might seem like a hassle, but they serve a purpose – to let you know when something needs your attention. By understanding these messages and following the necessary steps to resolve them, you’ll be able to keep your treadmill in peak condition.
If you encounter an error message that is not listed here or if you are unsure about how to fix the issue, it’s always a good idea to refer to your treadmill’s user manual or contact the manufacturer’s customer support. They will be able to provide you with specific troubleshooting steps tailored to your treadmill model.
So, the next time your treadmill flashes an error message at you, don’t panic. Take a deep breath, consult our guide, and you’ll be back to pounding the pavement – or treadmill belt – in no time!
Calibration Woes: Fine-tuning your Treadmill’s Display for Accurate Readings
When it comes to tracking your fitness progress, having accurate readings from your treadmill’s display is essential. However, sometimes these readings can be a bit off, causing frustration and confusion. That’s where calibration comes in!
Calibration is the process of fine-tuning your treadmill’s display to ensure accurate readings of distance, speed, and calories burned. While it may sound complicated, don’t worry! We’ve got your back with some simple steps to help you calibrate your treadmill like a pro:
- Consult your treadmill’s manual: The first step is always to refer to the manufacturer’s instructions. Each treadmill may have slightly different calibration methods, so it’s essential to familiarize yourself with your specific model.
- Check for loose connections: Before diving into calibration, make sure all the cables and connections are secure. Loose connections can lead to inaccurate readings, so give them a quick check before proceeding.
- Use a known distance: To calibrate the distance readings on your treadmill, measure a known distance using a measuring tape or a GPS device. This could be a track or a marked path in your neighborhood. Then, compare the distance displayed on your treadmill’s console with the actual distance covered.
- Adjust the wheel circumference: If your treadmill tracks speed based on wheel rotations, you may need to adjust the wheel circumference. Consult your manual for instructions on how to modify this setting.
- Consider the incline: Keep in mind that the incline on your treadmill can affect the accuracy of speed and distance readings. To ensure accurate results, it’s a good idea to calibrate your treadmill with different incline settings.
By following these simple steps, you’ll be well on your way to fine-tuning your treadmill’s display for accurate readings. Remember, consistency is key! It’s a good practice to recalibrate your treadmill every few months or whenever you notice significant discrepancies in the displayed data. Happy running!
Inaccurate Speed Readings: How to Adjust Speed Sensors and Restore Precision
Have you ever found yourself doubting the accuracy of your speedometer while driving? It can be quite frustrating, especially if you rely on precise speed readings for your daily commute or long journeys. Luckily, there are simple adjustments you can make to your vehicle’s speed sensors to restore accuracy and regain peace of mind.
1. Inspect and Clean the Sensors: Start by locating the speed sensors, usually located on the transmission or wheel hubs. Carefully examine them for any dirt, debris, or physical damage that might be affecting their performance. If you notice any buildup, gently clean the sensors using a soft cloth or brush. This simple step can often resolve inaccurate readings caused by sensor blockages.
2. Check for Proper Alignment: Speed sensors rely on precise alignment to accurately measure the rotation of your vehicle’s wheels or driveshaft. If they are misaligned, it can lead to incorrect speed readings. Take a moment to ensure that the sensors are in their correct positions and properly aligned with the components they interact with. Make any necessary adjustments to ensure everything is lined up correctly.
3. Verify Wiring Connections: Faulty or loose wiring connections can result in erratic speedometer readings. Examine the wiring harness that connects the speed sensors, ensuring that all connectors are securely fastened. If you find any damaged wires or loose connections, repair or replace them as needed. Additionally, check the wiring for any signs of corrosion or fraying, which may also affect accuracy.
4. Calibrate the Speed Sensors: Some vehicles have the ability to recalibrate the speed sensors using specialized software or diagnostic tools. If you have access to such tools, follow the manufacturer’s instructions to adjust the sensor settings to the correct values. This can greatly improve the accuracy of speed readings and eliminate any discrepancies.
5. Consult a Professional: If you’ve tried the aforementioned steps and are still experiencing inaccurate speed readings, it might be time to seek the assistance of a professional mechanic. They have the expertise and equipment to diagnose and rectify the issue effectively, saving you time and guesswork.
By following these simple steps, you can fine-tune your vehicle’s speed sensors and enjoy more precise speed readings on the road. Remember, maintaining accurate speedometer readings is not just about convenience, but also crucial for your safety and adherence to speed limits.
Heart Rate Monitor Glitches: Troubleshooting Tips for Accurate Heart Rate Tracking
So you finally got yourself a fancy heart rate monitor to help you track your fitness goals, but it seems like it’s not quite living up to its promise. Don’t fret! Heart rate monitor glitches can often be easily fixed with some simple troubleshooting. Here are a few tips to ensure accurate heart rate tracking and get the most out of your device:
1. Ensure Proper Placement
One common reason for inaccurate heart rate readings is incorrect placement of the monitor. Check that the sensor is securely attached to your body, preferably on your chest, just below your breastbone. You may need to adjust the strap for a snug fit without being too tight. Remember, a proper fit ensures optimal signal strength and accurate data collection.
2. Clean the Sensor Regularly
Regular cleaning can do wonders for maintaining the accuracy of your heart rate monitor. Sweat, dirt, and oils can accumulate on the sensor, interfering with its ability to read your heart rate. Gently wipe the sensor with a soft cloth dampened with water or mild detergent after each use. Be sure to dry it completely before the next workout session.
3. Check for Firmware Updates
Software glitches can be a nightmare, but luckily, most heart rate monitors allow for firmware updates to address any issues. Visit the manufacturer’s website or check your device’s companion app regularly to see if any updates are available.
4. Avoid Electro-Magnetic Interference
Electro-magnetic interference from other electronic devices can sometimes disrupt the heart rate monitor’s signal, leading to inaccurate readings. Keep your heart rate monitor away from sources of interference such as smartphones, microwave ovens, or other wireless devices, especially when trying to sync or record your heart rate data.
5. Replace the Battery
If your heart rate monitor is still acting up, it might be time to replace the battery. Low battery levels can cause irregular or inaccurate readings. Consult the manufacturer’s instructions to find out the recommended battery type for your device and follow the steps for proper replacement.
Remember, accurate heart rate tracking is crucial for optimizing your workouts and achieving your fitness goals. By following these troubleshooting tips, you’ll be well on your way to tracking your heart rate like a pro.
Entertainment Console Malfunctions: Restoring Functionality for an Enjoyable Workout Experience
Picture this: you’re gearing up for an intense workout session, ready to break a sweat and push your limits. But just as you reach out to select your favorite workout playlist or indulge in some binge-worthy TV shows, you realize that your trusty entertainment console has decided to call it quits. Frustrating, right?
Don’t worry, we’ve got you covered! Here are some handy tips and tricks to restore functionality to your entertainment console, ensuring a seamless and enjoyable workout experience:
1. Reset and Reboot:
Just like our brains sometimes need a quick reset, so do our electronics! Begin by turning off the console and unplugging it from the power source. Give it a few minutes to cool down, then plug it back in and power it up. This simple trick can often kick-start the console’s functionality. If the issue persists, move on to the next step.
2. Check Connections:
Cables and wires can sometimes work themselves loose, resulting in malfunctions. Ensure all the cables connecting your entertainment console to the TV, sound system, and power source are securely plugged in. Take extra care to inspect the HDMI and audio cables, ensuring they are not worn out or damaged. If any cables show signs of wear and tear, it might be time to replace them for optimal performance.
3. Software Updates:
Just like your smartphone or computer, an entertainment console often requires regular software updates to keep running smoothly. Check the manufacturer’s website or the console’s settings menu for any available updates. Download and install the latest software version to ensure compatibility with the latest apps, games, and streaming services. These updates often fix glitches and ensure optimal functionality.
With these handy tips, you’ll be well on your way to restoring functionality to your entertainment console and creating the perfect ambiance for an enjoyable workout session. Happy sweating and happy streaming!
Q&A
Q: Why is my treadmill display showing inaccurate speed readings?
A: This is a common error that can occur due to various reasons. Firstly, check if the belt is properly adjusted and not slipping. If it is moving too fast or too slow, you may need to recalibrate the speed sensor. Refer to your treadmill’s user manual for specific instructions on how to do this. Additionally, dust or dirt accumulation on the speed sensor can also disrupt accurate readings. Wiping it clean with a soft cloth may resolve the issue.
Q: I see random error codes on my treadmill display, what should I do?
A: Error codes can indicate different issues depending on the make and model of your treadmill. However, a general troubleshooting step is to turn off the machine, unplug it from the power source, and wait for a few minutes before plugging it back in. This simple reset often resolves minor glitches causing the error codes. If the error persists, consult the user manual or contact the manufacturer for further assistance.
Q: My treadmill display is not working at all. How do I fix it?
A: If your treadmill display is completely unresponsive, start by checking the power source. Ensure that the power cord is securely connected to both the treadmill and the outlet. If it’s plugged in properly and still not working, verify that the outlet is functioning by plugging in another device. In case the outlet is working fine, there could be an issue with the internal circuitry. It is recommended to contact a professional technician or the manufacturer for repairs.
Q: Why does my heart rate monitor on the treadmill display show inaccurate readings?
A: Heart rate monitor inaccuracies can stem from improper placement or poor contact with the sensors. Make sure your hands are clean and free of any lotions or oils that may interfere with the detection. Adjust the grip on the sensors, ensuring a firm placement so that the contacts are touching your skin consistently. If the issue persists, consider wearing a chest strap heart rate monitor as it tends to be more accurate than the built-in sensors.
Q: How can I resolve issues of data not being saved on the treadmill display?
A: If your workout data is not being saved on the treadmill display, start by checking if you are using the correct user profile or account. Some treadmills require the user to log in or select their profile before every session. Additionally, ensure that you are not reaching the data storage limit on your treadmill. Clearing old workout data or freeing up storage space can sometimes solve this problem. Finally, if none of these steps work, refer to the user manual for instructions on restoring factory settings or contact the manufacturer for further assistance.
Q: What should I do if my treadmill display lights up but does not respond to any commands?
A: When the display lights up but remains unresponsive, try to perform a hard reset. This typically involves turning off the treadmill and unplugging it from the power source for at least 5 minutes. This allows the system to reset and often resolves any temporary glitches. Afterward, plug the treadmill back in, turn it on, and check if the display is now responding to your commands. If the problem persists, contact the treadmill manufacturer for further troubleshooting steps or potential repairs.
Wrapping Up
So there you have it, a rundown of the most common errors you might encounter on your treadmill display and how to fix them. We hope this article has shed some light on these frustrating issues and provided you with the solutions you need to keep your workouts on track.
Remember, the key to resolving these errors is patience and a little troubleshooting. Whether it’s a simple restart, a software update, or checking the wiring connections, you now have a range of techniques to tackle these problems head-on.
If you continue to experience persistent display errors despite trying these fixes, don’t hesitate to reach out to the manufacturer’s customer support. They are trained to handle these issues and can offer further guidance tailored to your specific treadmill model.
Finally, always keep in mind the importance of regular maintenance to prevent future errors. Cleaning the display, ensuring proper ventilation, and keeping your treadmill in good condition will go a long way in avoiding these annoying glitches.
Now go out there, fix those treadmill display errors, and get back to crushing your fitness goals! Remember, a little patience and troubleshooting can go a long way. Happy running!